Why Pi-Hole?
The internet is a nicer place without adverts. I’ve been using Pi-Hole since I first heard of it several years ago and got my first Raspberry Pi.
Why the guide?
Having recently upgraded my internet connection, I needed to reconfigure my home network so decided to document the process (my previous notes are dotted around in text files). A lot of the procedures are much simpler now than when I first tried, so long as you can find the correct instructions. Pretty much every guide I found that purported to describe what I wanted to do had something wrong with it (likely due to outdated information or slightly different scenario) and working out what I needed to change wasn’t always simple.
Hardware
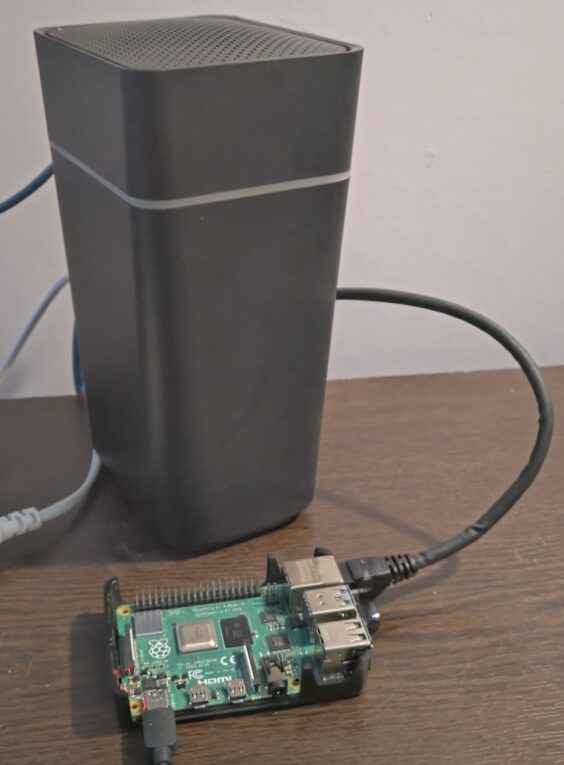
My internet connection is provided by a Virgin Hub 4. This provides a good wireless signal (much better than my previous router), though is missing some fairly basic features (e.g. the LAN IP4 range is not configurable).
I am using a Raspberry Pi 4 running Ubuntu 20.04 as the Pi-Hole host. It sits next to the Hub 4 and is plugged into one of the LAN sockets (though it’s a shame that the Hub 4 doesn’t have a USB socket to provide power to the Pi).
Setting up the Raspberry Pi
Prepare the SD card and enable remote access
Raspberry Pi Imager is the easiest way to create the OS. I chose Ubuntu LTS 20.04 as at the time of writing, Pi-Hole does not work on 22.04 (I tried that first). Use the options to configure the Pi to connect to the wireless network and enable SSH, as well as setting a new username/password.
Once the image is written and the Pi booted with the card, it will connect to the wireless network. I used the admin panel of the Hub 4 to find the IP address, and then used that with PuTTY to SSH to the Pi to finish the set-up.
First steps after log-in:
sudo apt update
sudo apt upgrade
sudo reboot
Configure LAN
As the DNS and DHCP server, the LAN will be a static IP address. I only use wireless to configure in the first instance as the Raspberry Pi Imager doesn’t allow configuration of LAN settings.
It’s very easy to configure the LAN, though:
sudo nano /etc/netplan/99_config.yamlAnd then define the network. I chose IP adddress 192.168.0.254. I would normally choose a different range, but the Hub 4 doesn’t allow me to change its IP address, so I need to work within the 192.168.0.x range. The nameservers won’t work until Pi-Hole is installed and working. The network config file looks like this:
network:
  version: 2
  renderer: networkd
  ethernets:
    eth0:
      addresses:
        - 192.168.0.254/24
      gateway4: 192.168.0.1
      nameservers:
          search: [mydomain, otherdomain]
          addresses: [192.168.0.254, 192.168.0.254]
Save, and then apply:
sudo netplan applyTo test, you can disconnect PuTTY and reconnect on your chosen IP.
Install Pi-Hole
Two lines of code to install Pi-Hole and run Pi-Hole:
sudo curl -sSL https://install.pi-hole.net | bash
pihole -a -p
Configure DNS and DHCP
Log in to the Pi-Hole admin panel (in my case, this is at http://192.168.0.254/admin) to complete the configuration. I won’t go into detailed steps (the Pi-Hole UI is really easy and there are numerous good guides already available online), but I set it up to use OpenDNS as the primary DNS servers with the default blocklist. I then set up DHCP to distribute addresses in the range 192.168.0.100 – 192.168.0.250.
As soon as DHCP is enabled in Pi-Hole, it should be disabled on the Hub 4. This is the final step to implement whole network ad-blocking.
As a final note, I was without the ad-blocking for a couple of days while I did some physical reconfiguration of the network. The internet really is much better without adverts.